




Why Hard Water Stain Removal Matters for Your Home
Hard water stain removal is one of the most common cleaning challenges facing homeowners in North Chicagoland. Those stubborn white, chalky deposits that cloud your shower doors, spot your faucets, and dull your windows aren’t just unsightly—they’re mineral buildup that can actually etch into surfaces if left untreated.
Quick Answer: How to Remove Hard Water Stains
- For Glass & Shower Doors: Spray with equal parts white vinegar and water, wait 10-15 minutes, scrub with a soft sponge, rinse and dry
- For Toilets: Pour 1 cup vinegar into bowl, add ½ cup baking soda, let fizz for 15-20 minutes, scrub and flush
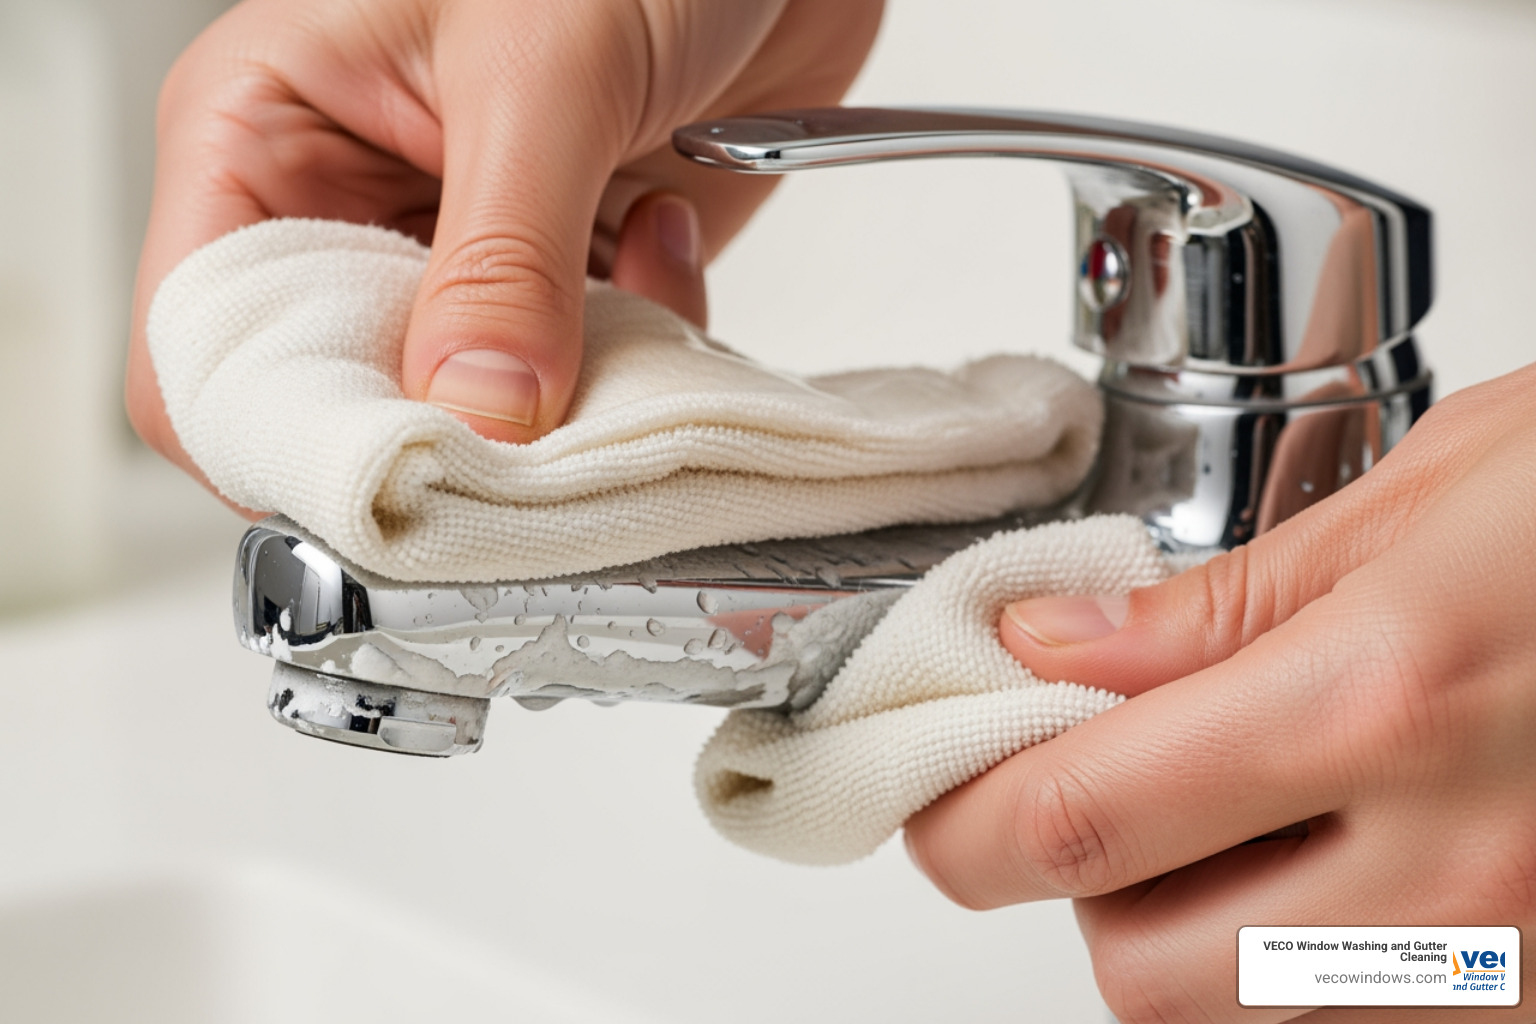
- For Faucets: Wrap vinegar-soaked cloth around fixture for 30 minutes, scrub with soft toothbrush, rinse
- For Appliances: Run a cycle with 50/50 vinegar and water mixture, followed by a clean water rinse
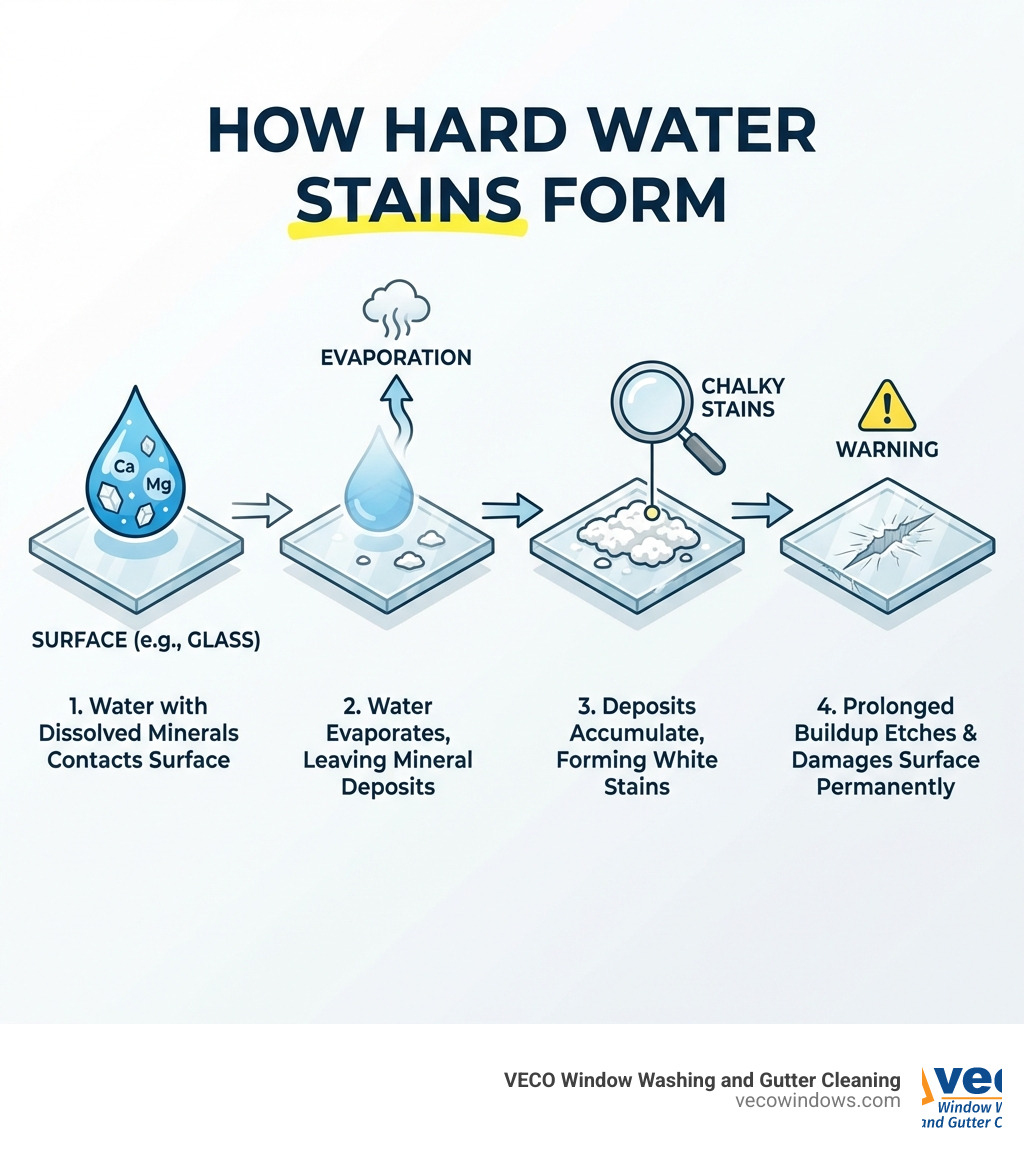
Hard water has a high concentration of minerals—primarily calcium and magnesium. When water droplets evaporate from your surfaces, these minerals stay behind as that familiar white, crusty residue. Over time, this limescale buildup can become increasingly difficult to remove and may even cause permanent damage to glass and fixtures.
The good news? Most hard water stains respond well to simple household ingredients you probably already have. The key is understanding which method works best for each surface and acting before the stains become etched in permanently.
In this guide, we’ll walk you through everything you need to know—from the right cleaning solutions to surface-specific techniques that actually work.
Your Cleaning Toolkit: The Best Solutions for Hard Water Stains
Tackling hard water stain removal effectively starts with having the right tools and solutions at hand. For most household hard water challenges, we can rely on readily available, often natural, ingredients. These DIY solutions leverage the power of mild acids to break down those stubborn mineral deposits.
Our go-to DIY solutions include:
- White Vinegar: This household hero is a mild acid that works wonders on mineral deposits. Its acidic properties dissolve the calcium and magnesium, making them easier to wipe away. We often use it undiluted for tough stains or diluted with water for general cleaning.
- Baking Soda: A gentle abrasive, baking soda can be used as a paste with water or vinegar. It helps to physically scrub away deposits without scratching delicate surfaces, while also reacting with acids to create a fizzing action that further loosens stains.
- Lemon Juice: Similar to vinegar, lemon juice contains citric acid, which is effective at dissolving mineral buildup. It’s a great alternative for surfaces where you prefer a fresh citrus scent.
Beyond these simple solutions, a few essential tools will make your hard water stain removal efforts much more successful:
- Non-Abrasive Sponges and Scrub Brushes: These allow us to apply gentle pressure without damaging surfaces. Always choose soft options to prevent scratches.
- Microfiber Cloths: Perfect for wiping, rinsing, and drying, microfiber cloths are excellent at absorbing moisture and buffing surfaces to a streak-free shine.
- Spray Bottles: Ideal for applying liquid solutions evenly to large surfaces like shower doors or windows.
- Protective Gloves: Essential for protecting our hands from prolonged contact with cleaning solutions, even mild acids like vinegar, which can cause skin irritation.
When we’re dealing with hard water stains, it’s crucial to understand that they contain high amounts of mineral deposits: lime, silica, and calcium. These minerals are what we’re targeting with our low-pH (acidic) cleaners. Unlike high-pH, bleach-containing products, acidic solutions are specifically formulated to break down these mineral bonds.
Common Mistakes to Avoid When Cleaning
Even with the right solutions, making certain mistakes can hinder your progress or even damage your surfaces. We’ve learned from experience that avoiding these pitfalls is key to successful hard water stain removal:
- Using Abrasive Scrubbers: While tempting for tough stains, harsh scrubbers or steel wool (unless superfine 00000 grade on glass with glass wax) can scratch surfaces like glass, chrome, and porcelain. These tiny scratches then become perfect new anchors for future mineral deposits, making future cleaning even harder. Always opt for non-abrasive sponges or cloths.
- Mixing Chemicals: This is perhaps the most critical safety warning. Never, ever mix acidic cleaners like vinegar or lemon juice with bleach or ammonia-based products. This combination can create toxic, poisonous gases that are extremely dangerous to inhale. Always ensure proper ventilation when cleaning.
- Not Allowing Solutions to Soak: Hard water stains are hardened mineral deposits. They need time for the cleaning solution to work its magic. Spritzing and immediately wiping won’t cut it. Letting the solution sit for 10-30 minutes (or even longer for very stubborn stains) allows the acids to dissolve the minerals, making them much easier to remove.
- Using Bleach on Mineral Stains: Bleach is an oxidizer and a disinfectant, effective for organic stains and germs. However, it’s formulated at a high pH and is not effective at dissolving mineral deposits. For hard water stain removal, we need low-pH, acidic cleaners.
Patience and the right technique are often more effective than brute force. As Lowes.com reminds us, tackling hard water stains quickly prevents them from becoming built-up layers that are much harder to remove later.
DIY vs. Commercial Cleaners
When it comes to hard water stain removal, we often have a choice between homemade solutions and specialized commercial products. Both have their place in our cleaning arsenal, and understanding their pros and cons helps us decide which to reach for.
| Feature | DIY Solutions (Vinegar, Baking Soda, Lemon) | Commercial Hard Water Removers |
|---|---|---|
| Pros | – Natural, non-toxic, eco-friendly | – Often more powerful for tough stains |
| – Inexpensive and readily available | – Formulated for specific mineral types | |
| – Safe for most surfaces (with caveats) | – Can save time on very heavy buildup | |
| – Less harsh fumes | ||
| Cons | – May require more soaking time/effort | – Can contain strong acids (e.g., hydrofluoric, hydrochloric) |
| – Less effective on extremely heavy/etched stains | – Potential for harsh fumes and skin irritation | |
| – Not suitable for all surfaces (e.g., natural stone) | – Higher cost | |
| – May require more careful handling and ventilation |
Our preference is always to start with DIY solutions. They are cost-effective, environmentally friendlier, and often perfectly sufficient for regular hard water stain removal. White vinegar, for instance, is a remarkably versatile and powerful cleaner for mineral deposits. Its mildly acidic properties help dissolve and break down these deposits, as noted by experts like Jennifer Cosco.
However, there are times when commercial cleaners are necessary. For exceptionally tough, long-standing, or etched-in stains, a specialized low-pH commercial product may be required. These products often contain stronger acids designed to tackle severe mineral buildup. If we do use a commercial product, we always read the labels carefully, follow instructions precisely, and ensure adequate ventilation. It’s crucial to understand the ingredients and their potential interactions, especially avoiding mixing any cleaner with bleach or ammonia.
A Surface-by-Surface Guide to Hard Water Stain Removal
Different surfaces require different approaches when it comes to hard water stain removal. What works for glass might etch granite, and what’s effective on a toilet might be too harsh for a delicate fixture. The key is tailoring our methods and always, always testing on an inconspicuous spot first. Patience is truly key, as allowing solutions time to work is often more effective than aggressive scrubbing.
Effective hard water stain removal from Glass, Shower Doors, and Windows
Glass surfaces, such as shower doors, windows, and mirrors, are particularly prone to showing hard water stains. The cloudy, white film can obscure the clarity we love. Here’s how we tackle them:
- Vinegar and Water Spray: Mix equal parts white vinegar and water in a spray bottle. Generously spray the entire stained glass surface. For stubborn stains, you can use undiluted white vinegar.
- Soak Time: Let the solution sit for 10-15 minutes. For very heavy buildup, we might let it sit a bit longer, up to an hour. The acid needs time to break down the mineral deposits.
- Scrub Gently: Using a non-abrasive sponge or microfiber cloth, gently scrub the surface in circular motions.
- Rinse and Squeegee: Rinse the glass thoroughly with clean water. For a streak-free finish, especially on shower doors and windows, we use a squeegee. Professional window cleaners swear by the S-pattern technique with a squeegee: start at the top corner and move in a smooth, continuous “S” motion across the glass. Wipe the squeegee blade clean after each pass.
- Dry: Finish by wiping down any remaining water or streaks with a clean, dry microfiber cloth.
For extremely tough spots, you can make a paste of equal parts baking soda and water. Apply it to the stain, let it sit for 10 minutes, then spray with the vinegar solution. The fizzing reaction will help lift the stain. Scrub gently, rinse, and dry.
At VECO Window Washing, we understand the nuances of keeping glass sparkling, whether it’s through routine cleaning in places like Vernon Hills, IL or intricate tasks like window sill cleaning in Mundelein.
Tackling Toilets, Tiles, and Tubs
These bathroom surfaces are constantly exposed to hard water, making them prime targets for mineral buildup.
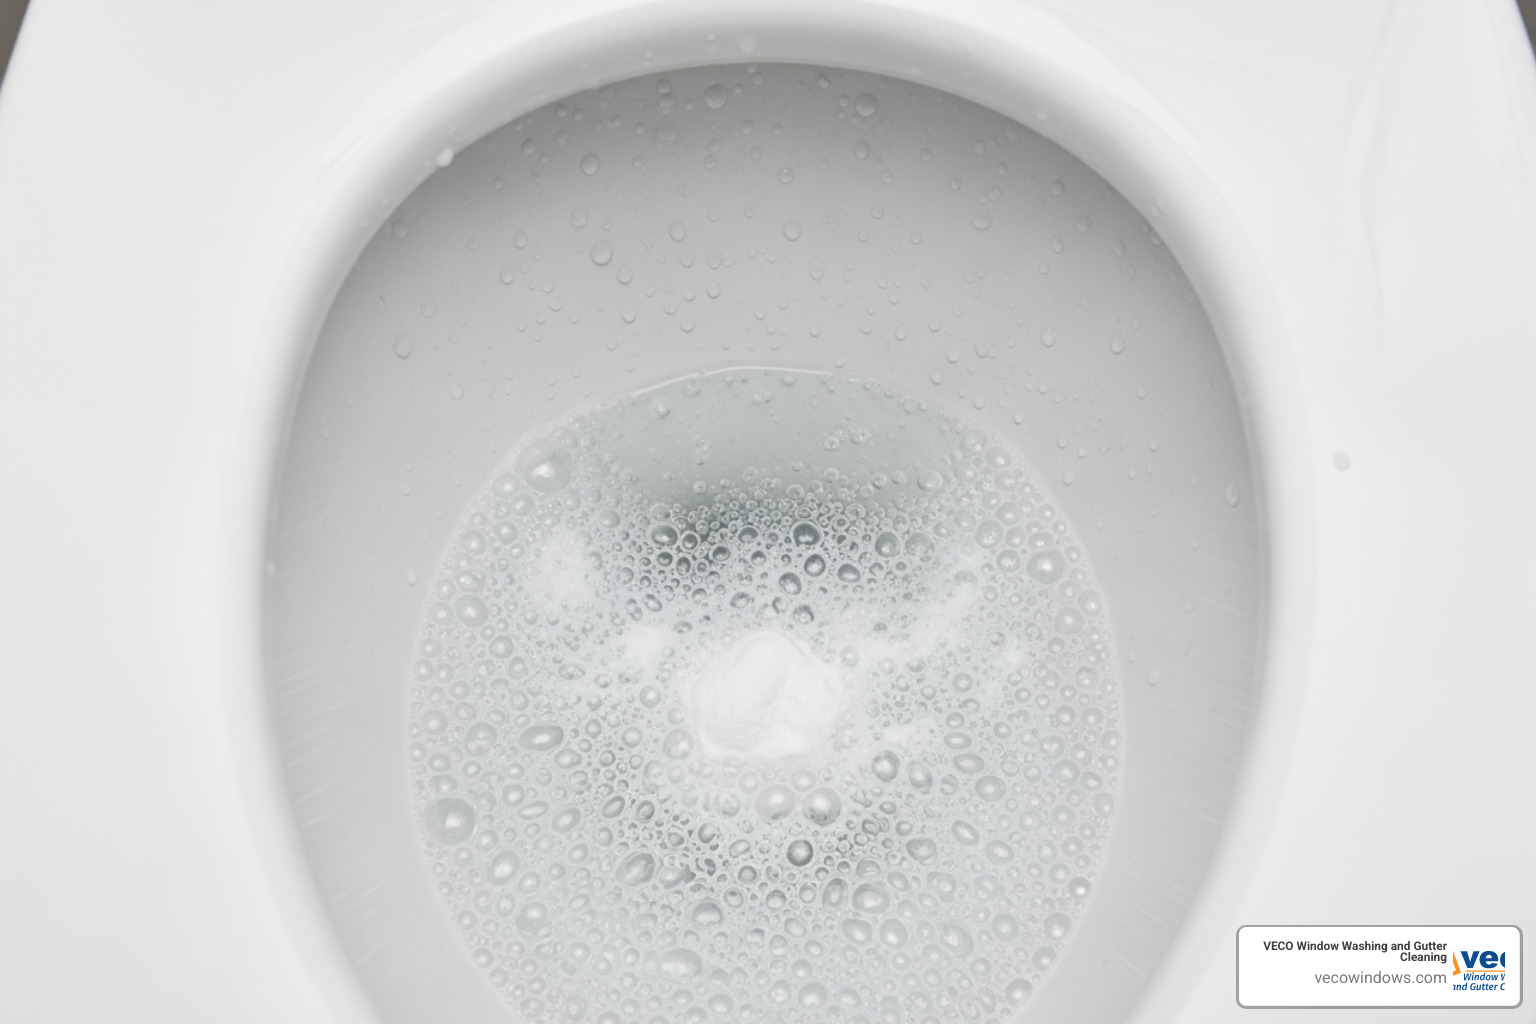
Toilets: The dreaded toilet ring is a classic hard water stain.
- Vinegar Soak: Pour one cup of white vinegar directly into the toilet bowl, aiming to get it under the rim if possible.
- Baking Soda Fizz: Sprinkle about half a cup of baking soda into the bowl. The combination of vinegar and baking soda will create a fizzing action, which helps to loosen the mineral deposits.
- Soak and Scrub: Let this mixture sit for 15-20 minutes, or even longer for very stubborn rings. Then, scrub vigorously with a toilet brush, making sure to get under the rim.
- Flush: Flush the toilet to rinse away the residue. For particularly tough stains, a pumice stone can be used carefully on porcelain, but avoid excessive force to prevent scratching.
Tiles and Grout: Hard water can leave a dull film on tiles and darken grout lines.
- Acidic Application: Apply undiluted white vinegar or lemon juice directly to the stained tiles and grout using a spray bottle or a cloth.
- Soak Time: Allow the solution to soak for at least 10 minutes. For heavily stained grout, we might let it sit longer.
- Scrub: Use a soft-bristled cleaning brush or an old toothbrush to scrub the grout lines and tile surfaces.
- Rinse and Dry: Wipe with a damp cloth, rinse thoroughly with clean water, and dry to prevent new spots.
Tubs (Acrylic, Fiberglass, Porcelain, Cast Iron, Enamel): Tubs can accumulate a combination of hard water stains and soap scum.
- Vinegar or Baking Soda Paste: For acrylic and fiberglass tubs, we use a vinegar solution or a paste made from baking soda and water. Apply it with a soft sponge or a Magic Eraser. Avoid abrasive cleaners or scrub brushes, as these can scratch the surface.
- For Tougher Tubs: For porcelain, cast iron, or enamel tubs, which are more durable, we can use vinegar or baking soda with a stiff brush. For very tough stains, some experts, like Janet Thaeler from Clean Freak and Germaphobe, recommend products like Soft Scrub, allowing it to sit before scrubbing.
- Soak and Scrub: Let the chosen solution sit for 15-30 minutes. Scrub gently but firmly.
- Rinse: Rinse the tub thoroughly with water.
Restoring Shine to Faucets and Fixtures
Chrome and stainless steel faucets and fixtures can quickly lose their luster due to hard water spots.
- Vinegar-Soaked Cloth Method: Soak a clean microfiber cloth in white vinegar.
- Wrap and Wait: Wrap the vinegar-soaked cloth directly around the stained parts of the faucet or fixture. Ensure good contact with all the stained areas.
- Soak Time: Let it sit for at least 30 minutes. For more stubborn buildup, we might leave it for an hour or even longer. This method allows the vinegar to continuously work on the mineral deposits.
- Scrub and Rinse: Remove the cloth. Use a soft toothbrush to gently scrub any remaining stains, especially in crevices and around the base of the fixture.
- Dry: Rinse the fixture thoroughly with water and then immediately dry it with a clean microfiber cloth to prevent new water spots.
For showerheads with clogged nozzles due to mineral buildup, you can fill a plastic bag with white vinegar, secure it around the showerhead with a rubber band, and let it soak for several hours or overnight. Remove the bag, scrub with a brush, and run hot water to flush out loosened minerals. As Martha Stewart suggests, this focused soaking is incredibly effective for restoring shine and function to fixtures.
Descaling Appliances for Better Performance
Hard water doesn’t just affect visible surfaces; it also impacts our appliances, reducing their efficiency and lifespan.
Dishwashers: Hard water can leave dishes cloudy and the dishwasher interior looking dull.
- Vinegar Cycle: Place a bowl filled with one to two cups of white vinegar on the top rack of an empty dishwasher.
- Hot Cycle: Run the dishwasher on the hottest cycle. The vinegar will help descale the interior and improve the shine of your dishes.
- Optional Cleaner: For very heavy buildup, after the vinegar cycle, you can run another cycle with a commercial dishwasher cleaning product.
- Filter Cleaning: Don’t forget the filter and washer arms! Soaking them in vinegar for 30-45 minutes can remove buildup.
Coffee Makers: Mineral deposits can clog coffee maker components, affecting taste and brewing efficiency.
- Vinegar Solution: Fill the water reservoir with a 50:50 mixture of white vinegar and water.
- Brew Cycle (Partial): Place a clean paper filter in the basket. Run a brew cycle halfway through, then turn off the machine and let it sit for 30 minutes. This allows the vinegar solution to soak and descale the internal components.
- Complete Cycle: Turn the machine back on to complete the brewing cycle.
- Rinse Cycles: After the vinegar cycle, run at least two full cycles with plain, clean water and new filters to thoroughly rinse out any vinegar residue.
Regular descaling of appliances, along with professional services like window cleaning in Highwood, IL, helps maintain the overall cleanliness and efficiency of your home.
Winning the War: How to Prevent Future Hard Water Stains
The best defense against hard water stains is a good offense: prevention. While we can’t change the mineral content of our water, we can significantly reduce the chances of those unsightly stains forming.
- Wipe Surfaces Dry Immediately: This is perhaps the simplest and most effective preventative measure. Hard water stains form when water evaporates and leaves minerals behind. By wiping down shower doors, faucets, and countertops immediately after use, we remove the water before it can evaporate. Keep a microfiber cloth or a small squeegee handy in the bathroom.
- Use a Squeegee After Showers: For shower doors and tiles, a squeegee is your best friend. A quick swipe after each shower can prevent significant buildup. Many people attach a squeegee with a suction cup right inside the shower for convenience.
- Regular Cleaning Schedules: Incorporating hard water stain removal into our routine cleaning schedule is crucial. Weekly or bi-weekly cleaning with mild acidic solutions (like diluted vinegar spray) can prevent minor deposits from becoming major problems. As Martha Stewart’s approach implies, regular vinegar treatments in the toilet can keep it spotless.
- Consider a Water Softener: For homes in areas with consistently very hard water, a whole-house water softener is the ultimate long-term solution. A water softener removes the calcium and magnesium ions from your water before it even reaches your fixtures and appliances, drastically reducing or eliminating hard water stains throughout your home. This is a significant investment but can save countless hours of cleaning and extend the life of your plumbing and appliances.
- Apply Protective Coatings: For glass shower doors, you can apply water-repellent sprays or waxes designed to make water bead up and run off, reducing the amount of water left to evaporate.
- Optimize Appliance Use: In dishwashers, use high-quality detergents designed for hard water and consider adding a rinse aid. These products help prevent mineral deposits from clinging to dishes and the appliance interior.
By implementing these preventative strategies, we can significantly reduce the frequency and severity of hard water stains, keeping our homes looking cleaner and our appliances running more efficiently. This proactive approach, much like regular window cleaning in Inverness, IL, ensures long-term maintenance and beauty for your home.
Frequently Asked Questions about Hard Water Stain Removal
We often get asked common questions about hard water stain removal. Here are some of the most frequent ones we encounter, along with our expert answers.
How long does it take to remove hard water stains?
The time it takes depends on several factors: the severity of the stain, the type of surface, and the chosen cleaning method. Minor, fresh stains might wipe away almost instantly with a vinegar spray. However, for more stubborn or built-up stains, we typically recommend a soaking time of 10-30 minutes, and sometimes even an hour or more. For appliances like coffee makers or dishwashers, the cleaning cycle itself can take longer. Heavy buildup might require repeat applications and extended soaking times. Patience is key; letting the solution work is more effective than aggressive scrubbing.
Can hard water stains become permanent?
Unfortunately, yes. While most fresh hard water stains are removable, if left untreated for too long, the mineral deposits (calcium, magnesium, lime, silica) can actually etch into surfaces like glass, porcelain, and even granite. This etching is a chemical change to the surface itself, making the stains impossible to remove completely with standard cleaning methods. The surface becomes physically pitted or corroded, and while you might be able to clean away the visible mineral buildup, the etched marks remain. This is why prompt and regular hard water stain removal is so important, especially in our North Chicagoland area where hard water is common.
Is it safe to use vinegar on all surfaces?
While white vinegar is a fantastic and versatile cleaner for hard water stain removal, it is not safe for all surfaces due to its acidic nature. We must exercise caution, especially with delicate materials.
Surfaces to Avoid or Use with Caution:
- Natural Stone (Marble, Granite, Travertine, Limestone, etc.): Vinegar can etch, dull, or discolor these porous, calcium-rich stones. For these surfaces, we recommend a baking soda paste or a pH-neutral cleaner.
- Cast Iron: Vinegar can strip away the seasoning on cast iron cookware, leading to rust.
- Some Grout: While usually fine for ceramic tile grout, prolonged exposure to strong vinegar can sometimes degrade certain types of grout sealants. Always test in an inconspicuous area.
- Electronic Screens: The acid can damage protective coatings.
- Rubber (prolonged exposure): Can sometimes degrade rubber seals over time, though occasional use for soaking faucet heads is generally fine.
Always Test First: Even on seemingly safe surfaces, we always recommend testing any new cleaning solution, including vinegar, on a small, inconspicuous area first to ensure it doesn’t cause damage or discoloration.
Conclusion: Enjoying Your Spotless, Stain-Free Home
Tackling hard water stain removal might seem like a daunting task, but with the right knowledge, tools, and a bit of patience, we can keep our homes in North Chicagoland sparkling clean. We’ve learned that understanding the cause of these mineral deposits—primarily calcium and magnesium—is the first step toward effective treatment. Our journey through DIY solutions like white vinegar, baking soda, and lemon juice, combined with specific techniques for glass, toilets, faucets, and appliances, empowers us to restore the shine to our homes.
The most crucial takeaway, however, is that prevention is truly the best strategy. By adopting simple habits like wiping surfaces dry after use, using a squeegee in the shower, and maintaining a regular cleaning schedule, we can significantly reduce the formation of new stains. For those living in areas with particularly hard water, investing in a water softener can be a game-changer, offering a long-term solution to this persistent problem.
While many hard water stains can be effectively managed with DIY methods, some challenges require expert intervention. For tough, etched-in stains on exterior glass or hard-to-reach windows, or if you simply prefer to leave the detailed work to professionals, the experts at VECO Window Washing have the tools and experience for the job. We specialize in delivering crystal-clear windows and pristine exterior surfaces across Northbrook, IL, and the wider North Chicagoland area.
Don’t let stubborn hard water stains diminish the beauty of your home. Take action today, whether it’s with your newfound DIY skills or by reaching out to us for professional assistance.
For professional Window Cleaning services, contact us today!